Thursday 31 March 2011

Plane Chase - Animation


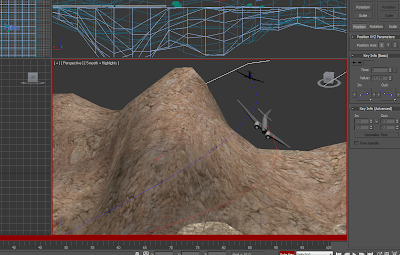
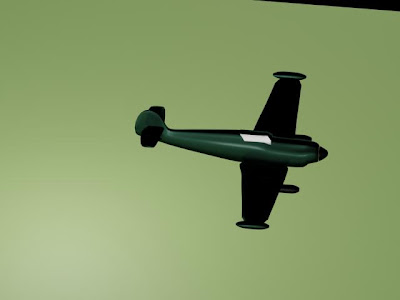
For the first part of the plane chase I have used the path constraint technique to arrange the planes in the exact positions I wanted them.


As the planes go past the camera I wanted to create a realistic camera shake and used the tutorial below which uses the Assign Controller on the motion panel. I adjusted the settings differently to start the shake as the planes went past rather than a continuous shake.


Tuesday 29 March 2011

Week 10 - Reactor


This scene was created using a ridgid reactor which enabled the objects to interact with eachother when a force was applied. For the ground the Mass was set to 0 as this object would not move but the friction was increased so that when the ball rolled over it, it would slow it down. The pins where given a lower mass than the ball and the ball was given a keyframe of it moving in the direction of the pins otherwise when the reactor was added it would just fall vertically.

Tuesday 22 March 2011

Week 9 - Morphing

The morpher tool enables you to apply more than one animation to one object. I followed the tutorial http://beorangedesign.com/tutorials/3D/Morpher.zip and created a sleepy head by converting the head to an editable poly and then cloning it. I changed the facial expressions on the cloned heads and then applied morpher to the original and applied each different head in the channel list. I then added them onto the key frames to create my animation.


Tuesday 15 March 2011

Quantum Of Solace Title


To create the title page animation I first made a plane with a plaster wall material applied to it. Then I made a tube for the barrel of the gun and made a dull metal like material to apply to that, I placed a light inside the barrel to reflect around it and another light at the front of the plaster wall. I put a free camera inside the barrel and animated it to come out of it.
I made a mask for the title and the gun. I staggered the O, 7 logo and writing on the animation to land on the wall at different times.
I am happy with the end result.

Week 8 - bones


Today I learnt how to apply bones to an object and link and edit them so that they move in a natural way. I did this by following the in class bones tutorial and found help from http://www.youtube.com/watch?v=MRikV-jTFfc

It explains how to use IK limb solvers and envelops and aplly skin. Below is a short animation of the edited torso.

Friday 11 March 2011

Bond Shadow


To create the Bond shadow I used the same masking technique I did for the leaf tutorial. Once I created the mask I imported it as a material in 3DS max and added a diffuse to make the cut out of Bond.

I then made the ground by adding a gravel material and increasing the bump to improve the detail. I used a spot light and target camera to get the angle and ambiance that I wanted.


Tuesday 8 March 2011

Animation Path Constraint


I have created a basic rollercoaster by drawing a line and editing using spline poly and creating a box then fixing it via path constraint. I then edited the Path options to give the illusion of the cart climbing the hill slowly and going down it fast. I then made a target camera and edited the path options the follow the cart.
To finish I made a seperate path for the camera itself to follow.


Week 7 - Animation

This is my first animation I have created in Autodesk 3DS Max. I started by creating a sphere and using the Auto Key tool made a key frame and moved the sphere on the Z axis. Then using the Parameter curves out of range in the graph editors I put a loop onto the animation to make it continue for the whole timeline.

I then cloned this sphere two more times and selected all and staggered their timelines using the track view dope sheet in the graph editors. I also changed their shapes and in the parameter curves graph made the bigger one larger curve to bounce higher and slower and the smaller sphere I gave a smaller curve to bounce faster and not as high.

I rendered it as a movie by changing the render set up from single to range and selected where I wanted the file and what file type.

Friday 4 March 2011

Week 6 cont.

As I had trouble with the poly's being to high in my previous plane, I re-created it with the least amount possible.

Week 6

To finish the Marchetti plane I added a window by creating a box above the main body and added a glass material to it. For the main body I created a metal material using an online tutorial and adjusted the glossiness and colour to match the plane in the film. I used the same metal material and changed the colour to black for the nose and guns.


For the area around the hotel I created a plane with a large amount of polygons so that I could put more detail into the ground. I started by selecting polygons and raising them for the main shape and then used the paint deformation tool to smooth it out and create mountains in the background.


I was not happy with my first attempt of this and because of the large amount of polygons the system worked very slowly. I will only sculpt the area immediately around the hotel and then will try to create the mountains with a plane with larger polygons.