Having completed this module I am confident that I can use all the basic features and also some complex ones. I was apprehensive in the first half of the semester that I would not be able to model everything on my storyboard. Although I did not do every scene I had originally planned, I know that the ones I have done have sufficiently covered all the techniques that were shown in the tutorials.
My favorite model was the hotel as I feel this had the most likeness to the actual hotel.
In the second half of the semester I came across some problems with materials and rendering. In one of my scenes with the plane chase parts of the plane rendered with a different material, even after adding the correct one. I believe this to be some sort of glitch with the program and I was unable to resolve it. Another problem I had was with the daylight systems. The daylight system I created for the tutorial worked fine but when trying to add one to my hotel scene it produced many errors when rendering. Unfortunately this would have been the best type of light to show off the glass and other building materials. Because of this problem I had to merge the hotel into a new document to fix the errors, I was then unable to change any of the suggestions from my tutor. One of which was make the ground around the hotel more realistic.
Other improvements I would have made had I had more time would have been to create all the models myself. I was not able to complete my car so sourced a free model from the internet. I would have liked to have improved the sound tracks and would of had more sound effects to enhance the action shots.
Creating the dust, and smoke using particle systems was very interesting to me and I liked being able to adjust the settings to get the exact render I wanted. Overall this module has been very enjoyable and I will look forward to further improving my 3D animation skills.
Friday, 15 April 2011
Final Trailer
This is my final trailer. I am happy with the end result the sound files were sourced for free on the internet.
Thursday, 14 April 2011
First Scene

To create this scene I made the environment and cut out of a person. I borrowed the jeep from http://www.3dm3.com/modelsbank/model429.htm. Then created a PRray in particle system for the dust, I followed the tutorial below for this,
http://www.escalight.com/tutorials/3dsmax-tutorials/desert-chase-part1.html
Wednesday, 6 April 2011
Smoke, sparks and wind and an explosion
With the help from the above tutorials I have made the basis of my explosion for the hotel and I have created some realistic sparks and smoke for my plane.
To create the smoke I made a superspray and used the basic parameters in the cigarette tutorial alto ugh I made my particles much bigger. I then made a very strong wind so that the smoke would give the illusion of the plane moving fast and binded the smoke and wind together. To finish the smoke I made a material using a gradient on the opacity and setting it to 5 and making the diffused colour as white.

For the sparks I used the help from the explosion tutorial and used the parameters for the superspray only. I then assigned the wind to it like the smoke.
 This is the lens effect setup which I will be using on my explosion.
Thursday, 31 March 2011
Plane Chase - Animation
For the first part of the plane chase I have used the path constraint technique to arrange the planes in the exact positions I wanted them.
As the planes go past the camera I wanted to create a realistic camera shake and used the tutorial below which uses the Assign Controller on the motion panel. I adjusted the settings differently to start the shake as the planes went past rather than a continuous shake.

Tuesday, 29 March 2011
Week 10 - Reactor
This scene was created using a ridgid reactor which enabled the objects to interact with eachother when a force was applied. For the ground the Mass was set to 0 as this object would not move but the friction was increased so that when the ball rolled over it, it would slow it down. The pins where given a lower mass than the ball and the ball was given a keyframe of it moving in the direction of the pins otherwise when the reactor was added it would just fall vertically.
Tuesday, 22 March 2011
Week 9 - Morphing
The morpher tool enables you to apply more than one animation to one object. I followed the tutorial http://beorangedesign.com/tutorials/3D/Morpher.zip and created a sleepy head by converting the head to an editable poly and then cloning it. I changed the facial expressions on the cloned heads and then applied morpher to the original and applied each different head in the channel list. I then added them onto the key frames to create my animation.


Tuesday, 15 March 2011
Quantum Of Solace Title

To create the title page animation I first made a plane with a plaster wall material applied to it. Then I made a tube for the barrel of the gun and made a dull metal like material to apply to that, I placed a light inside the barrel to reflect around it and another light at the front of the plaster wall. I put a free camera inside the barrel and animated it to come out of it.
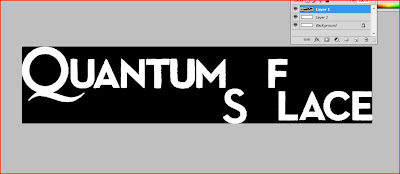
I made a mask for the title and the gun. I staggered the O, 7 logo and writing on the animation to land on the wall at different times.


I am happy with the end result.
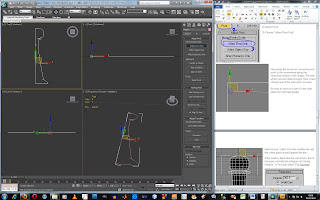
Week 8 - bones

Today I learnt how to apply bones to an object and link and edit them so that they move in a natural way. I did this by following the in class bones tutorial and found help from http://www.youtube.com/watch?v=MRikV-jTFfc
It explains how to use IK limb solvers and envelops and aplly skin. Below is a short animation of the edited torso.
Friday, 11 March 2011
Bond Shadow
To create the Bond shadow I used the same masking technique I did for the leaf tutorial. Once I created the mask I imported it as a material in 3DS max and added a diffuse to make the cut out of Bond.
 I then made the ground by adding a gravel material and increasing the bump to improve the detail. I used a spot light and target camera to get the angle and ambiance that I wanted.

Tuesday, 8 March 2011
Animation Path Constraint

I have created a basic rollercoaster by drawing a line and editing using spline poly and creating a box then fixing it via path constraint. I then edited the Path options to give the illusion of the cart climbing the hill slowly and going down it fast. I then made a target camera and edited the path options the follow the cart.
To finish I made a seperate path for the camera itself to follow.
Week 7 - Animation
This is my first animation I have created in Autodesk 3DS Max. I started by creating a sphere and using the Auto Key tool made a key frame and moved the sphere on the Z axis. Then using the Parameter curves out of range in the graph editors I put a loop onto the animation to make it continue for the whole timeline.
I then cloned this sphere two more times and selected all and staggered their timelines using the track view dope sheet in the graph editors. I also changed their shapes and in the parameter curves graph made the bigger one larger curve to bounce higher and slower and the smaller sphere I gave a smaller curve to bounce faster and not as high.
I rendered it as a movie by changing the render set up from single to range and selected where I wanted the file and what file type.
Friday, 4 March 2011
Week 6 cont.
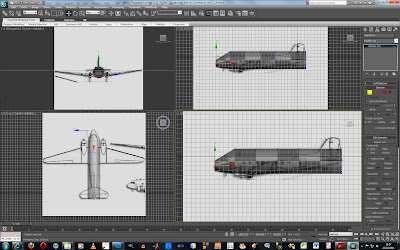
 As I had trouble with the poly's being to high in my previous plane, I re-created it with the least amount possible.
Week 6
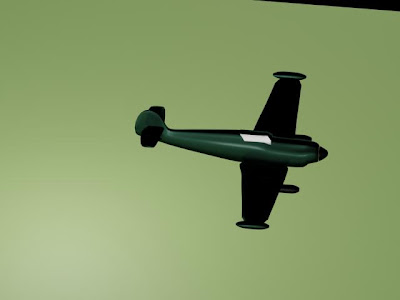
To finish the Marchetti plane I added a window by creating a box above the main body and added a glass material to it. For the main body I created a metal material using an online tutorial and adjusted the glossiness and colour to match the plane in the film. I used the same metal material and changed the colour to black for the nose and guns.
Metal tutorial - http://www.truecg.com/TextualTutorial.aspx?id=67
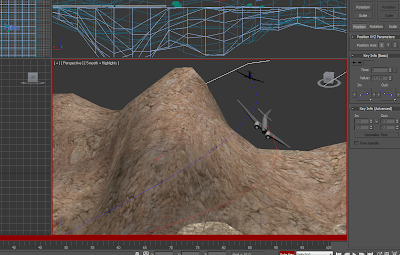
 For the area around the hotel I created a plane with a large amount of polygons so that I could put more detail into the ground. I started by selecting polygons and raising them for the main shape and then used the paint deformation tool to smooth it out and create mountains in the background.

 I was not happy with my first attempt of this and because of the large amount of polygons the system worked very slowly. I will only sculpt the area immediately around the hotel and then will try to create the mountains with a plane with larger polygons.
Monday, 28 February 2011
Hotel Materials
These are the materials I have added to my hotel. The glass below I added a DGS material as the diffuse colour and glass lume to the reflection.
 For the metal bars I created a metal material, specular level 100, glass level 70, reflection raytrace. This gives the bars a very realistic finish, rather than chrome which would have been too reflective.
 For the concrete I used a preset concrete material in the material library, I just changed the self-illumination colour to a dark brown instead of grey. The outcome of this is a very close match to the actual building.
Friday, 25 February 2011
My models
I used bevel to indent the engine and create the centre of the propellers.

 For the ESO hotel I am going to use photographs as my reference drawings and guess the dimensions from what I can see. This model should be fairly straight forward as all the parts are blocks but I will take extra care to make it as accurate to the actual building as possible. I have started by drawing one block and aligning them. I will then clone them.
Tuesday, 22 February 2011
First models - planes
My first two models I have decided to make for my trailer are two planes so that I can recreate to plane chase. These were made by creating the main body as a cylinder and then converting it to an editable poly and arranging them to match the blue prints. For the wings I created one and used symmetry to mirror the wing for the other side. I have yet to add materials to these. 


Week 5 - Cameras
Today I learnt the different tools to get different views and effects with cameras. Firstly how to arrange to target and free camera and then using the navigation tools such as dolly, perspective, roll and truck. Below is a camera view using perspective as well as depth of field which has made the rectangle in the background out of focus.
 The below view shows the target on the blue rectangle and depth of field enabled. I used orbit to rotate the camera and the objects closest to the camera are out of focus.
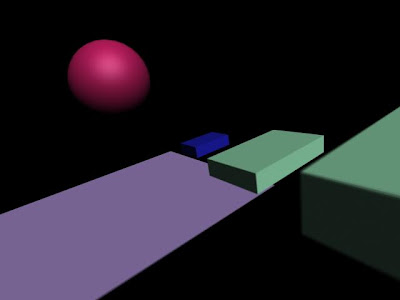 In this view I made the sphere the target and used a zoom lens. In this the objects in the background are out of focus.

The below view shows the target on the blue rectangle and depth of field enabled. I used orbit to rotate the camera and the objects closest to the camera are out of focus.In this view I made the sphere the target and used a zoom lens. In this the objects in the background are out of focus.Sunday, 20 February 2011

Tuesday, 15 February 2011
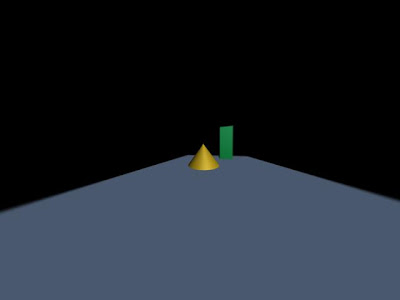
Week 4 - Lighting
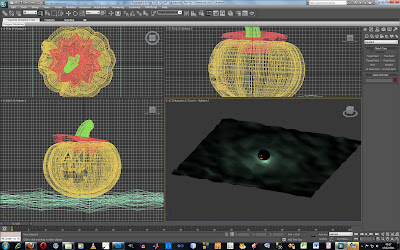
In today's tutorial we first created lighting effects using the standard omni light for the light inside of the pumpkin. I changed the colour and intensity to replicate a candle and turned on and adjusted the shadows.
 After that we set up a target spot light and adjusted the hotspot and falloff parameters to make a softer light. Then to create a smoky effect we modified the atmosphere and effects by adding a volume light.
 Following on from the tutorial we worked through 3ds max tutorial for daylight system for beginners. In this we were shown how to apply architectural settings to objects and set up realistic day light settings for scenes.

After that we set up a target spot light and adjusted the hotspot and falloff parameters to make a softer light. Then to create a smoky effect we modified the atmosphere and effects by adding a volume light. We were also shown how to exclude objects from lighting, this would be useful when we would want to highlight one object in a scene.
Following on from the tutorial we worked through 3ds max tutorial for daylight system for beginners. In this we were shown how to apply architectural settings to objects and set up realistic day light settings for scenes. 

Tuesday, 8 February 2011
Plane Chase Storyboard
 I will model two planes to craete the plane chase for my trailer. Also I will model a car for the scene of it driving across the dessert.
Week 3 - Introduction to materials


 Today I started to create objects with a realistic render by adding materials and adjusting the settings for the object that suit it appropriatley.
Week 2 - Modelling from shapes
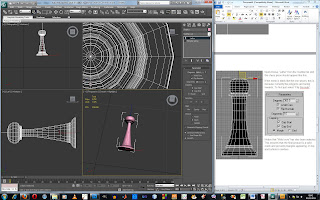
To make this chess piece I made half the drawing in Illistrator and then imported it into 3DS max and then revolved it using the Lathe tool in the modify menu.
 To create this shape I used the Loft tool after creating the helix shape and the shape for the cross section.
 For the tank I created two planes, and adjusted them to be level with each other. Then improted the images and using UV map aligned both images with eachother. From these references I was able to create the tank.


Subscribe to:
Posts (Atom)